Home Gallery The Process Email
Custom Cosmic Art

From Image to Ornament in 10 easy steps

(You can click on the images for larger versions, use the back button on your browser to get back here)

Solo

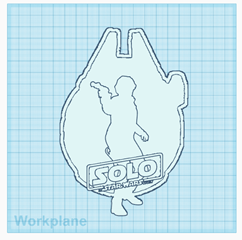
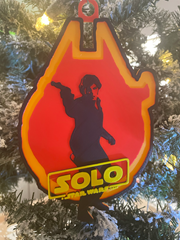
Step 1) We get an image and decide what to do with it. in this case, the image had way too much detail so we decided to just focus on the logo, the silhouette of Solo, the colors and the outline, which is the Millennium Falcon (of which I found an image online that I could trace)

Step 2) The different colors are only achieved by having the individual parts at different heights, so you can top them off with the color you want.
To get the 3-D model you have to split the final image up in different images which you prepare with those different heights. For example, the silhouette is printed in black, after that, you change the spool of filament and continue printing the logo in yellow. So the logo needs to come out higher than the silhouette.
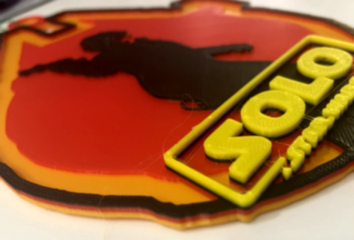
The original image had a background that faded from orange to red. So I made the background of the Falcon orange, and then another part, which was a millimeter higher, red, so I could print both in different colors. You can see in the picture how it looks on the side with all these different layers. From the top, you only see the colors as they are supposed to look, not the ones underneath those.

Solo
Solo

Step 3) After you save the different image parts in .png files, you have to transfer those each individually to SVG files. Scalable Vector Graphics (SVG) is a web-friendly vector file format. This means you can resize your SVG as needed without losing quality, while PNG images, on the other hand, can become pixelated if enlarged too much.

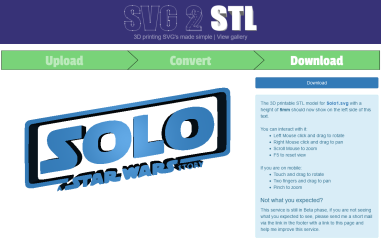
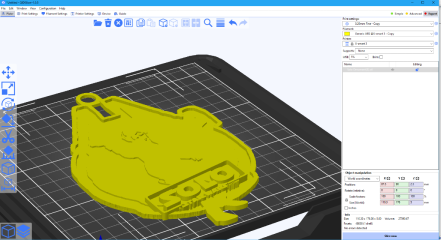
Step 4) The SVG files can now be converted to three dimensional files, we call those STL files. With these 3-D files you can specify the height for each individual one. The first is the outline of the entire ornament, that one will be orange and 1 mm high. Then you add the red part, which is 1 mm higher, so 2 mm. Next is the Han Solo silhouette, which will be black and 4 mm. Finally the logo, which will be yellow (instead of blue like in the preview picture) and 5 mm high.

Solo
Solo

Step 5) Now you combine all these STL files in the right position and merge them into one STL file.

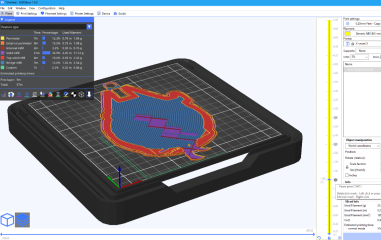
Step 6) This STL file needs to be prepared specifically for your 3-D printer, we call that process "slicing". Within the slicer, you can set pauses at certain points during a print so you can change the spool from one color to the next. You can see those pause points along the yellow colored vertical time line on the right. The preview image shows what the print looks like at the exact time it has the first pause programmed in, at this point it's done printing the part that will look orange from the top and will continue with the red. That red part (blue in the preview) also includes the parts that eventually will be black and yellow. With those you won't see the red because it is underneath, unless you look from the side like the image from step 2.
There you can see the red layer and the black layer underneath the yellow one.

Solo
Solo

Step 7) You load the printable file from the slicer on a USB stick and put it in the 3-D printer. Make sure you start with the correct color.
I usually set the speed to 50% to make sure the first layer is perfect. To improve adhesion, I run a glue stick over the printer bed.

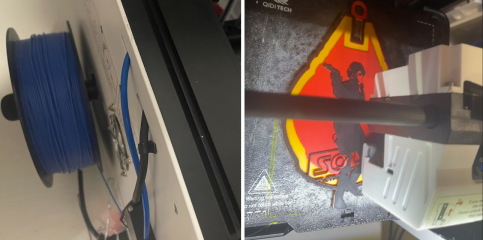
Step 8) The printer will now draw the plastic filament from the spool through the gears in the extruder, it then feeds it into the nozzle, which is hot enough to melt the plastic and leaves the filament in the desired shape while it goes over the bed and then over the rest of the print.

Solo
Solo

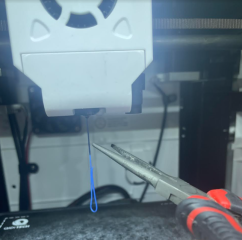
Step 9) After it has printed enough layers to get to the point where it requires the color change, it will pause like you programmed it. You make sure the nozzle is hot enough to release the filament that is still in the nozzle, and press a button that will start the gears in the extruder to feed the filament backwards. While that is going on you pull the filament out of the feeding tube and roll it back on the spool. Then you feed in the new filament and have it extrude a little to make sure the right color is coming out, not the previous one. Once that’s the case, you resume printing, while first making sure you remove the little extra filament that always comes out, I use needle nose pliers to remove that while the nozzle moves back to the print. You have to be quick to catch it just right, but it beats having a little unwanted glob on your print.

Step 10) After changing the color spools the desired amount of times (in this case three times), your print eventually finishes. Then you take the magnetic plate that the ornament is printed on from the printer, and bend it a little to release the print, because we used some glue to make sure the first layer had enough adhesion. A typical ornament takes between one and two hours to print this way. The skull in the time-lapse clip below took 11 hours.

Solo
SkullTimeLapse
Home Gallery The Process Email